Introduction:
Forest fires are a growing concern around the world, endangering ecosystems, wildlife, and human lives. In the face of this challenge, technology comes to the rescue. In this blog, we'll explore a DIY project that combines the power of the ESP32 microcontroller and a flame sensor to create a smart forest fire detection system. This innovative project showcases how accessible technology can be harnessed to protect our natural environments.
Understanding the main components- ESP32 and Flame Sensor
The ESP32 microcontroller is equipped with a dual-core processor, which enables simultaneous execution of multiple tasks and ensures efficient performance. It also features a wide range of input/output pins, allowing for easy integration with various sensors and modules.
The flame sensor consists of an infrared receiver and an infrared transmitter. The infrared receiver detects the infrared radiation emitted by fire, while the infrared transmitter emits a signal to determine the distance between the flame sensor and the fire source.
When a fire is detected, the flame sensor sends a signal to the ESP32 microcontroller, triggering an alert or activating additional safety measures as programmed in the system. This real-time detection capability is crucial in preventing the spread of fires and minimizing the potential damage caused.
Step-by-Step Guide: Building Your DIY Forest Fire Detection System
Before getting started, ensure that you have all the required materials and tools. Here's a list of what you'll need:
Step 1: Gather the Necessary Materials
- ESP32 microcontroller
- Flame sensor module
- Jumper wires
- Breadboard or PCB (Printed Circuit Board)
- LEDs (Light-Emitting Diodes)
- Resistors
- Power supply (battery or USB power source)
- Connecting wires
- Computer with Arduino IDE or compatible programming platform
Step 2: Set Up the ESP32 Microcontroller
Begin by setting up your ESP32 microcontroller. Connect it to your computer using a USB cable. Install the necessary drivers if prompted.
Open the Arduino IDE or compatible programming platform and configure it to work with the ESP32 board. Make sure to select the correct board and port in the Tools menu.
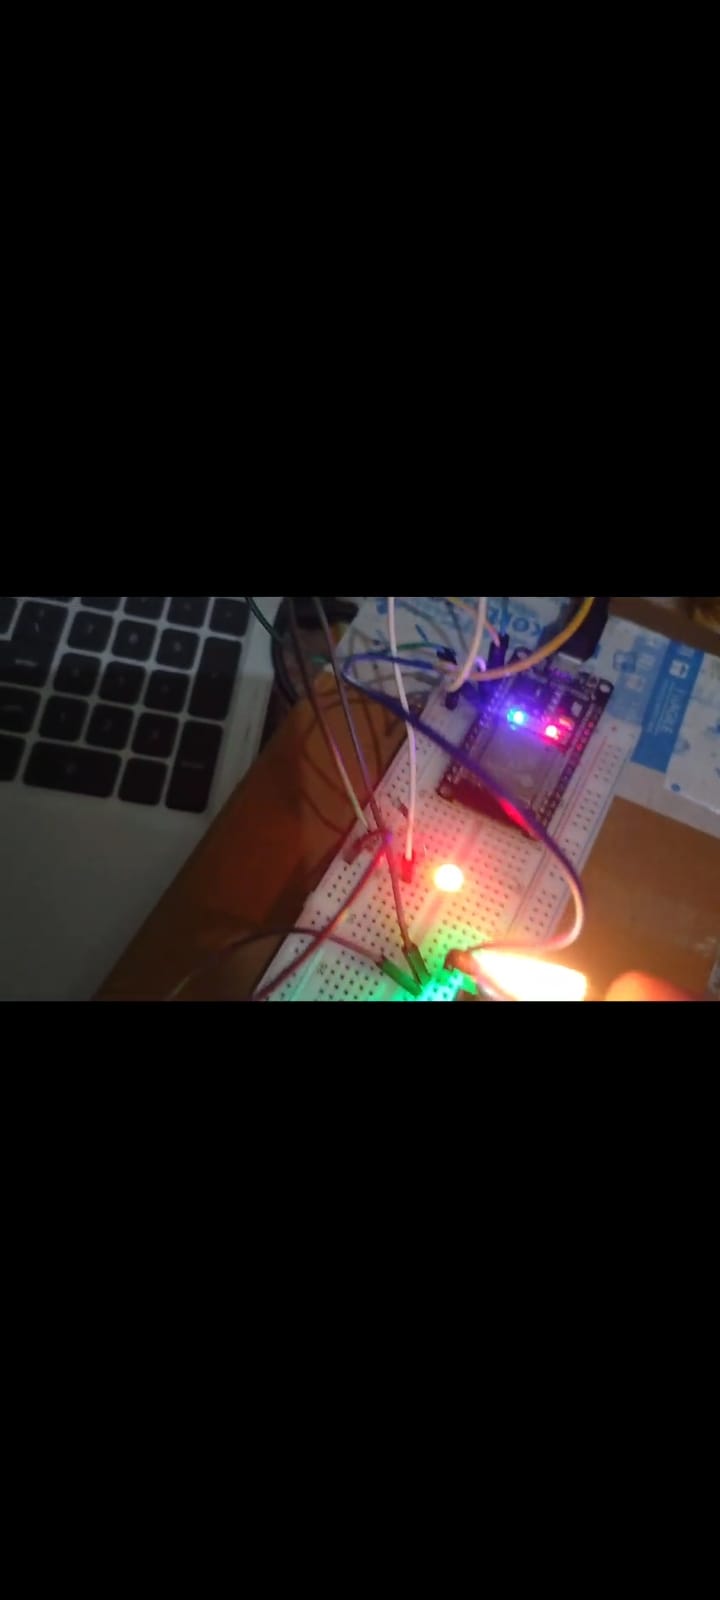
Step 3: Connect the Flame Sensor
Next, connect the flame sensor module to the ESP32 microcontroller. Use jumper wires to establish the following connections:
- Connect the VCC (Voltage Common Collector) pin of the flame sensor to the 3.3V or 5V pin of the ESP32.
- Connect the GND (Ground) pin of the flame sensor to the GND pin of the ESP32.
- Connect the OUT (Output) pin of the flame sensor to any available GPIO (General-Purpose Input/Output) pin of the ESP32. Note down the pin number as it will be used in the programming step.
Step 4: Add LED Indicators
To provide visual feedback, you can add LEDs to indicate the status of the fire detection system. Connect LEDs to GPIO pins of the ESP32 as follows:
- Connect the anode (long leg) of each LED to separate resistors (for current limiting purposes).
- Connect the cathode (short leg) of each LED to different GPIO pins of the ESP32.
- Connect the other ends of the resistors to the GND pin of the ESP32.
Step 5: Write and Upload the Code
Now it's time to write the code for your DIY forest fire detection system. Open a new sketch in the Arduino IDE and write the code that defines the behaviour and logic of your system.
Use the appropriate functions and libraries to read input from the flame sensor and control the LEDs. You can set a threshold value to determine when the system should trigger an alert or activate additional safety measures.
Once you have finished writing the code, upload it to the ESP32 microcontroller. Ensure that the correct board and port are selected in the Arduino IDE and click the upload button.
Step 6: Alert Mechanism
- Implement an alert mechanism using the ESP32's built-in Wi-Fi capabilities using Blynk cloud
- When the flame sensor detects a potential fire, the ESP32 should send an alert to a designated mobile application or Blnk cloud
Step 7:Real-time Monitoring
- Access the data from the flame sensor and ESP32 remotely through Wi-Fi using blynk .Monitor the data using your smartphone, tablet, or computer to keep an eye on the forested area's safety.
Step 8 :Testing
1: Create a Testing Environment
Set up a controlled environment to simulate different fire scenarios. This can include using a controlled flame source, such as a lighter or candle, at various distances from the flame sensor. Ensure the testing area is well-ventilated and free from flammable materials.
2: Monitor the Output
Observe the behavior of the system when exposed to the controlled flame source. Pay attention to the LED indicators and ensure that they accurately reflect the presence and intensity of the flames. Take note of any false positives or false negatives.
3: Adjust Threshold Values
Fine-tune the system by adjusting the threshold values used to determine when the system should trigger an alert or activate safety measures. This can be done by modifying the code on the ESP32 microcontroller. Consider factors such as the sensitivity of the flame sensor and the desired level of sensitivity for detecting fires.
4: Perform Multiple Test Runs
Repeat the testing process multiple times, varying the distance, intensity, and duration of the controlled flame source. This helps validate the system's consistency and reliability across different fire scenarios. Make note of any adjustments needed throughout the testing process.
5: Evaluate and Validate Results
Analyze the test results and evaluate the system's performance. Compare the system's detection capabilities to known fire incidents or data to validate its accuracy. Assess the system's ability to detect fires quickly and reliably.
6: Calibrate the Sensors
If necessary, calibrate the flame sensor to ensure its readings are accurate and aligned with the desired sensitivity. Follow the manufacturer's instructions or consult relevant resources on sensor calibration to make precise adjustments. This step is crucial for maintaining the system's accuracy over time
Benefits of the Project:
Conclusion:
The forest fire detector project, using an ESP32 and a flame sensor, exemplifies how technology can contribute to the preservation of our natural ecosystems. By combining accessible components and coding skills, you can create a smart detection system that aids in early fire detection, thus playing a pivotal role in protecting forests and ensuring a sustainable future. This project is a testament to the potential of DIY technology solutions in addressing real-world challenges.
https://drive.google.com/file/d/1mY5Vmb-OwJunpxndepe9xYDKczBIt0EI/view?usp=sharing

Project-Based Learning has the potential to solve many of the learning problems we see today beyond foundational literacy.